Thursday, December 23, 2010

Cheers! A Very Yummy Raw Holiday Beverage


'Tis the season! For holiday parties, family, food...and for many people, yummy holiday cocktails. Raw foodies don't have to be left out when it comes to drinking fancy, celebratory beverages...we just have to be a little more creative!
Here's a recipe for a drink inspired by one I had - with booze - many many years ago. Back when we were young New York gals, my friend Megan and I made a tradition of going out for yummy holiday cocktails around Christmas time. A bartender at the Blue Water Grill in Union Square made us his specialty concoction, a spicy, creamy spiked martini. Megan and I disagree on what it was called...I say "The Spice Route," while she insists it was "The Spice Rack." But we agree, and have reminisced many times, that it was delicious, and certainly a very good holiday drink.
This one's for you, Megan! The Raw Spice Route:

1/2 cup cashews (or almonds)
2 cups water
3-4 medjool dates
One vanilla bean (or a teaspoon or so of vanilla extract)
1 teaspoons cinnamon (or more, to taste)
1/4 teaspoons or more each of nutmeg, allspice, ground cloves

First, blend the cashews, dates and water until very smooth. Check for consistency and desired creaminess and sweetness. Add a few more dates for more sweetness. I used very soft medjools, so they blended easily, but if your dates are a little drier, you may want to pit and soak them for a half hour or so first. Also, cashews will work best if you are using a regular blender, because they are softer. Almonds will probably work fine in a high speed blender, although you may want to strain the milk after you blend it. Add more cashews for creaminess, or a little more water for a thinner drink.
Blend in the seeds of one vanilla bean, or vanilla extract, as well as the spices. Start with a little on the spices, and add more if you want a spicier drink.
Serve at room temperature, chilled and/or over ice, or warmed slightly in the blender.
I got fancy and garnished with a vanilla beans...you could sprinkle on a little cinnamon or nutmeg. Enjoy with someone you love! Happy Holidays!

Tuesday, December 14, 2010

Warm Up with Mexican Chocolate Truffles


Somebody has flipped the switch to all-out winter, across the country it seems. Brrrr...
People who can easily imagine eating a raw diet in the warmer months, when gazpacho and salads and cool fruit smoothies are all you feel like eating any way. But eating flavorful, warming foods like ginger, cayenne and other spices can make you feel toasty all over, without turning on the oven or boiling the kettle for tea.
Such is the case with these scrumptious Mexcian chocolate truffles, which I made for the Art Loop at Fresh Thymes about a week ago. And since the base is dates and walnuts, you can even eat them for breakfast (believe me - I have!).

Mexican Chocolate Truffles
1 cup walnuts
1 cup dates, pitted
1/4-1/2 cup raw cacao powder
1/4 teaspoon salt
1/2 teaspoon vanilla extract or a pinch of vanilla beans
1/8 teaspoon cayenne
1-2 tablespoons orange zezt
1-2 teaspoons cinnamon

In a food processor, blend walnuts, dates, salt and vanilla until a uniform dough forms. You should not see any walnut bits any more, the walnuts will be releasing their oils and greasing up the food processor, and the dough will be balling up.
Add the cocoa powder, orange zest, cinnamon and cayenne. The amounts I listed above are just a guide - start with a little, and add more of one or another to taste.
Process again, tasting for a nice balance of the flavorings, until well combined, and dough is again balling up.

Either roll into 1/2-1 teaspoon size truffles, or refrigerate the ball of dough, if it is still a little crumbly, to make it easier to work with. Refrigerate or freeze until ready to serve. before serving, dust with a 1:1 mixture of cocoa and cinnamon (I put mine in an old spice shaker). These should keep for at least a week in the fridge, longer in the freezer...unless I come over!
Enjoy your cozy, warming treat...raw appetit!

Thursday, December 2, 2010

Raw Food Dinner January 19...Plus a preview with some tasty goodies Friday, December 3!

In the mood for a healthy treat? I'll be sharing some raw goodies - both sweet and savory - at Fresh Thymes Cafe in Wilmington during tomorrow night's Art Loop, from 5:30-8:30pm. Fresh Thymes is host to the beautiful work of local artist Kate Hunsinger. Great art and and raw treats - can Happy Hour get any better than that?

Wilmington already loves Fresh Thymes Cafe, and its proprietresses, Jane and Jenn, for their fabulous fresh, local, seasonal cuisine. Come by on January 19 for a 3-course, gourmet raw food dinner! I’ll be talking a little bit about how raw food can benefit your health…and serving up tempting appetizers, a phenomenal pine nut and zucchini lasagna, and a decadent – yet guilt free! – dessert. This dinner is perfect for folks with allergies – most raw food is naturally free of gluten, eggs, dairy, etc. – vegetarians, vegans, and anyone looking to try something new! If you already love raw food, think about how awesome it will be to go to a restaurant, be able to eat everything on the menu, and enjoy a meal that tastes incredible, and makes you feel GREAT! Call Fresh Thymes at 302-656-2026 to make your reservation, as space is limited. Email me at angelasalvucci@hotmail.com with questions...

3-Course Raw Food Dinner

Wednesday, January 19

6:30pm

$40 per person

Fresh Thymes

1836 N. Lovering (Lincoln & Lovering)

Wilmington, DE 19806

Saturday, November 20, 2010

What's for Thanksgiving? Butternut Squashage Lasagna, of course!


I'm still working on my recipe for Thanksgiving this year (better hurry!), and the other night I put this together...still need to tweak it before I post the recipe, but it was delicious! I'm calling it Butternut Squashage Lasagna...a butternut squash puree, with sage & walnut "sausage" bits, and a cashew shallot cream sauce. The "noodles" were thinly sliced & marinated turnip. The flavors all blended really nicely together, and the squash actually came out more delicious than I expected...YUM!
And a bonus....yesterday I added some water to the remaining squash, and threw it in the blended with the rest of the cashew sauce...and voila! Butternut Squash bisque for lunch!

Saturday, November 13, 2010

Raw...and EASY!...Banana-Chocolate Cream Pie


I had a little hankering for a yummy dessert the other day, and I pulled this one together really quickly...its kind of a cheat, because it is more or less simple banana ice cream with a simple crust...but who cares, it was tasty! I try to always have several frozen bananas on hand, as they are great for smoothies, shakes, desserts...you name it. Here is a fancier looking, but easy way to use them! Always peel and break bananas into chunks before you freeze them in an airtight container. Here's how to make the pie...

First, make the crust:
1 1/2 cups of almonds, ground into a coarse flour
1/2 cup shredded coconut (unsweetened)
1 cup medjool dates, pitted (about 10-12...chop them up if they aren't soft)
Pinch of sea salt (about 1/4 teaspoon)

Blend almonds, coconut, dates and a pinch of salt together in a food processor, stopping occasionally to scrap down the sides and check on the mixture. Process until the mixture is sticky, climbing up the sides and rolling over...it should still be a little crumbly, but stick together nicely when you pinch it. Press into a spring form pan or pie plate. I used a 10 inch spring form pan, and greased the sides tiny bit with a little coconut oil so it would release easily.

Next, make the filling!
3 cups (about 4 bananas worth) of frozen bananas (make sure to peel and break them into chunks before they are frozen!)
1 not frozen banana
3/4 cup (or more, to taste) cocoa powder

Blend in the food processor, until very smooth, like soft serve ice cream. Stop occasionally to scrape sides and make sure the bananas aren't sticking in a clump. You could add some vanilla, or cinnamon, or whatever goes with bananas and chocolate if you want to make it extra fancy!
Pour/scoop banana chocolate mix onto the crust, and spread it to edges. Refreeze for an hour or two (okay, eat it right away, if you must!) and serve.

These quantities gave me a relatively low pie...if you want more of a filling-to-crust ratio, use a smaller pan, or make more banana blend! Raw appetit!

Friday, October 29, 2010

Chicken-free Soup...Even Better for the Soul! And, how to adapt recipes and get over it!


Whether you are just starting out with raw food, or haven’t eaten anything warmer than 112 degrees (or 115 degrees, or 118 degrees…depending on who you talk to) in a long, long time, it can be intimidating to tackle raw food recipes. Almost nobody grew up with raw techniques, gadgets, or exotic ingredients (I have still not had durian, the darling fruit of many a raw foodie, and might not know it if I fell over it!), so many new recipes can be an adventure, at best. At worst…food for the compost pile.

I’ve been at it for nearly two years, and when I’m at a loss for inventing something on my own, and checking out new raw recipes or considering adapting cooked ones, I still get a little intimidated occasionally, especially by hard-to-find or tricky to deal with ingredients.

I only recently overcame my fear of baby coconuts, and I realize that wouldn’t have been possible except that, for some reason, my regular Shoprite nearby happens to stock them. But I’m so glad I did…they are too costly and time consuming to whip up coconut dishes every day, but once in a while – what a treat!! So don’t let yourself get psyched out of trying new raw preparations, or you could miss out on something delish.

Yesterday, I was flipping through some un-cookbooks, looking at soup recipes. Not something I typically make, so I was looking for a little inspiration, and I decided to try the Chicken-Less Noodle Soup in Matt Amsden’s “RAWvolution.” But ran into a few roadblocks, and still managed to come up a fairly tasty dish in the end, after several adaptations.

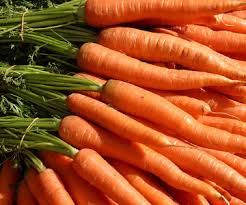
First, the recipe called for 3 ½ cups of daikon juice, from 2-3 daikon. My grocery store didn’t have any daikon…so I settled for a combination of juices…from 2 large golden beats, one little bag of radishes (probably about 8-10 small radishes), a small bunch of celery…and then several stalks of bok choy I had hanging around in the fridge. After all this, I only managed to come up with about 3 cups of juice…no worries! I just reduced the amount of water by a little (1 cup instead of 1 ¼, so there wouldn’t be too much dilution in the broth). Then the broth called for lemon juice…I’d just used the two lemons I had in a batch of homemade Gatorade…so, my broth would be missing a citrusy kick. My husband would never know! And if you don’t have a juicer? Who cares! Use your blender, and either strain out the solids, or enjoy a little more fiber!

The recipe called for 1/8 of a cup each of carrots and celery…I like to use my mandoline for slicing veggies, since it gives them a softer, more “cooked” texture, and it is barely worth dragging the thing out (and risking my finger tips!) for so little slicing…so I used at least ½ cup of each, and about a cup of the zucchini noodles, when the recipe called for ¼.

Finally, Amsden recommends adding sliced chanterelle mushrooms to the top of the soup…I’m not a huge mushroom fan, but I decided to give it a try…but the store only had dried chanterelles…and when I got them home, I realized the package said DO NOT EAT DRIED MUSHROOMS RAW. So much for that! (Although I did follow the package instructions to blanch the shrooms in boiling water, and put them in my hubby’s soup…he’s a fungi fan, and also isn’t worried about keeping raw).

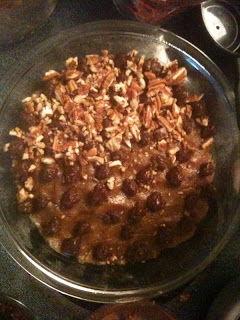
And for all my substitutions, the soup resembled cooked chicken soup (sans the contribution from Mr. Purdue), and even had a bit of that familiar taste. And certainly, if you soul is craving a little chicken soup, this chicken-less soup will be even better for it!

In sum, here’s what I did…I recommend “RAWvolution” for the inspiration for this tasty treat and many others!

3 cups worth of juice (or puree) of veggies…I used 2 largish golden beets, about 10 small radishes, a small bunch of celery, and a bit of bok choy, which didn’t really contribute much anyway.

Add to that 1 cup of water and 1 teaspoon of sea salt, and give it a whirl in the blender.

Pour broth into bowls (this will make about 2-3 servings), and divide the following among them: ½ cup thinly sliced carrots, ½ cup thinly slice celery, 1 cup zucchini noodles, and a handful of chopped parsley (my addition, because I love it, and it also seems very soup-y to me). You can warm the bowls up a little in the dehydrator, if you like, or a very low oven (make sure to check frequently on the temperature - I don't know what happens when you cook beet and radish juice!), or you could leave the broth in the blender til it warms up a little.

Be prepared to serve this with something else…it really isn’t super filling, and truthfully is a lot of work for not a lot of food…and as I like to say…raw appétit!

Wednesday, October 20, 2010

Go Nuts for Coconut!


My raw macaroons are now available at Fresh Thymes Cafe in Wilmington. The ladies there, Jenn and Jane Adams, are devoted serving to fresh, local, organic food...Visit them for a meal, and pick up some of my tasty macaroons as well!
The only ingredients are coconut, almond, agave nectar, coconut oil, vanilla, and a pinch of salt...a totally delicious treat for raw foodies, vegans, and omnivores alike! And they are an indulgence you can feel good about...they are full of fiber, plus coconut and coconut oil are said to improve metabolism, prevent disease, aid digestion, and provide antioxidants, as well as pack an antibacterial and antifungal punch. Almonds are a great source of magnesium and vitamin E. And the agave used to sweeten them is much lower on the glycemic index than regular sugar...yum!

For Raw Macaroons, plus other fresh delights, visit:
Fresh Thymes Cafe
1836 N. Lovering Ave (at Lincoln & Lovering)
Wilmington, DE


Monday, October 11, 2010

Reminder...Upcoming Raw Food Classes!


Don't forget to sign up for my upcoming classes...

It's harvest season...What better time to make the most of nature's bounty, getting as much nutrition and energy from fresh grown produce as possible with raw and living foods? Check out these upcoming raw food classes...email me atangelasalvucci@hotmail.com to sign up!


GET STARTED ON RAW FOOD!
Living on Live Food Level 1: Chef Certification

Are you ready to start losing weight, having more energy, and feeling positively radiant by eating the healthiest and tastiest food ever? This class is for you! You'll learn everything you need to get started on raw and living foods right now - no fancy gadgets or complicated techniques required! Just delicious, easy to make meals made of veggies, fruits, nuts and seeds. Join me to in this day-long class, designed by raw food author and restauranteur Alissa Cohen, where we'll discuss the basics of a day-to-day raw food lifestyle and make tasty dishes like "salmon" pate, angel hair pasta, fettuccine alfredo, stuffed mushrooms, collard roll-ups (a perfectly portable, take-anywhere raw meal!), broccoli soup, and of course, dessert...a delicious date nut torte, and more.
You'll leave class knowing how to set up your raw kitchen, shop for food, and prepare meals that even the kids will love! One recent participant said "...great introduction to what raw food is, and great recipes! I am excited to go home and make the recipes myself...I really enjoyed myself today..." Another called the class "very educational and eye-opening."
SAVE $15 each if you sign up with a friend!

Saturday, October 23
10am-3pm
Wilmington, DE
$125 Includes breakfast & lunch, raw recipe booklet, and Chef Certificate from Alissa Cohen.
EMAIL ME at angelasalvucci@hotmail.com to register.
****Please sign up by October 15. No refunds will be issued after that date****


JUST DESSERTS!
Delicious Treats, Naturally Free of Wheat, Gluten, Eggs, Dairy...and Guilt!

Tell the host "I'll bring a dessert!" and know there will be a scrumptious indulgence at the holiday party that won't derail your healthy eating plans.

We'll learn raw food dessert recipes that taste amazing, are actually nutritious, and are safe for a lot of the allergy sufferers out there. Plus, some quick & simple treats to whip up at home when the urge for something sweet strikes. Not a baker? No problem! You don't even have to turn on the oven for these goodies!

Come hungry for fruit pies, brownies, cookies, ice cream...and take home a few treats, too!

SAVE $5 each if you sign up with a friend!

Sunday, November 14
1pm-3pm
Wilmington, DE
$30 Includes raw recipe booklet, demos and samples, and a goody bag.
EMAIL ME at angelasalvucci@hotmail.com to register.
****Please sign up by November 8. No refunds will be issued after that date****

Wednesday, September 29, 2010

Get Muscles from Brussels...Sprouts, that is!


Hello, my name is Angela, and I enjoy brussels sprouts...Add Image
Does that seem weird? I really love the little buggers. I should say - I USED to really love them, cooked, and haven't actually had them raw. Until the other day, when I saw some great-looking fresh ones at a farmers market, and decided to give it a go.
Even a girl who regularly makes - and devours - huge salads of vegetables that most people use only for garnishing was a little concerned that maybe brussels sprouts would be kind of, well, gross when they weren't sauteed with prosciutto and apple, or topped in a creamy dijon sauce, or at least steamed with a little salt and pepper.
But believe it or not, the little mini cabbage cuties were actually very tasty when just slice thin and marinated. You could just use a little salt, pepper and olive oil, and maybe a squirt of lemon...or try this concoction below as a marinade, which I based on memories of restaurant cooked brussels preparations...ground mustard seed for that hint of dijon flavor, paprika for a little smokiness, chopped date for some sweetness.
First, shred brussels sprouts like you would cabbage for a slaw...either with a knife for mandoline. I cut mine into quarter-inch ribbons. Break them all apart, and don't leave any hard bulby parts in there. I used about 3/4 of a pound of sprouts, to produce about 5 cups of ribbons. The weight will depend on how big your sprouts are, though...the bigger guys come with more unusable bulbiness.
In a small bowl, use a fork to whisk together:
1/2 teaspoon ground mustard
1/4-1/2 teaspoon paprika
2 tablespoons olive oil
1 tablespoon fresh lemon juice
2-3 medjool dates, chopped as finely as you can (it's tricky, for they are sticky!)
Salt, to taste (start with 1/4 teaspoon in the marinade, then taste and season the mixed concoction.
Toss brussels sprouts very well with dressing, until all those little strands are coated, and taste for seasoning. Adjust seasoning, and cover...let marinate for an hour at least (or less if you are in a hurry...they just won't be as soft). I liked this served at room temp, but try it chilled as well...you may like it better that way...raw appétit!


Wedding Salad! Arugula with Cilantro-Lime Dressing and Watermelon


The food at my wedding this summer was amazing. The raw lasagna the kitchen took on the challenge to make as our veggie option was fantastic (and I'm told all the cooked dishes were great, as well).
We kicked off the meal with an arugula salad dressed with cilantro-lime dressing and topped with watermelon. I neglected to get the recipe, but here's my own. Hopefully there are a last few fresh watermelon where you are to try it out! Otherwise, keep the recipe for an elegant salad to serve next summer.
This recipe serves 2-3 as an appetizer or side salad - double or triple it depending on how may you are having!
First, you need to slice about a cup of watermelon verrrry thin. I cut mine into blocks with a surface that was about 1 inch x 3 inches, and then sliced it on the mandoline, so I got little ribbons. Matchsticks would also work, or small cubes.
In the food processor (I used my mini chopper, since it is a small quantity), blend:
2 tablespoons of lime juice (probably about 1-2 limes)
2 tablespoons of olive oil
1/4-1/2 cup fresh cilantro (to taste)
1 teaspoon or so of agave nectar, to taste (or, 1-2 soft dates)
1/8 teaspoon salt (or more, to taste)
Tiny pinch of cayenne (or more, to taste)
Just before serving, toss 4-5 cups of arugula with the dressing, and briefly toss in the watermelon, or arrange with watermelon on top on the serving plate.
Raw appétit!


Overcoming My Fear of Coconuts, with Chocolate Coconut Cashew ice cream


I have been resistant to use coconut meat in recipes, both because the young coconuts you need for the recipes are a pain to hack into, and because they are expensive.
But last week, I wanted to make a decadent desert for my hubby's birthday, and decided to try chocolate ice cream with a rich coconut and cashew base. It was a special occasion, so I could justify the cost and effort...and actually, the effort didn't turn out to be horrible, and we had delicious ice cream for several days. A little more than Ben & Jerry's would run you, but better for you and deeeeeeelish.
I kind of based my recipe on how much coconut was easy to scrape out...the hubby attacked the more difficult to reach leftover coconut meat for breakfast. You could go without chocolate here if you want to make vanilla ice cream, add some fruit, whatever.
I won't begin to try to describe how I broke into the coconuts. Youtube has several instructional videos...I pretty much just hacked until I pried open a hole, drained the coconut water, and hacke until I could pry off the top of the coconut, and spoon out the meat. I didn't keep the coconut water, because it had turned a little brown, as if a little air had gotten to it, but the meat still tasted fresh, and was white like it should be.
Here's the recipe:
1 cup fresh coconut meat (1-2 coconuts, depending on their size and how much meat they contain)
1 cup cashews, soaked 2 hours (they measured 1 cup prior to soaking), then drained
1 cup water (use the coconut water if it is good)
1/2 cup raw cacao powder (more if you like a stronger cocoa flavor)
1/4 cup agave, or a little more to taste (you could also blend dates with a little water if you prefer not to use the agave)
Teaspoon of vanilla extract (if you don't object to using it) or fresh vanilla beans scraped from the pod
Blend all ingredients in a blender until completely smooth, stopping frequently to scrape down sides and making sure that the blender doesn't heat the mixture.
Pour mixture into your ice cream maker, and follow instructions from there...If you don't have an ice cream maker, you can make this as a pudding, with less water. Start with 1/4 cup or so, and see how much you need to make it pudding-y.
I made a thick chocolate syrup to top the ice cream with a mixture of 1 part cocoa:1 part coconut oil, and a little agave, to taste. You could layer that into a container with the ice cream, and refreeze, and call it fudge ripple!
This ice cream was a total hit. It was amazing and creamy and just terrific.
And, I've overcome my fear of coconuts, at long last!

Wednesday, September 22, 2010

Upcoming Raw Food Classes!!


It's harvest season!

What better time to make the most of nature's bounty, getting as much nutrition and energy from fresh grown produce as possible with raw and living foods? Check out these upcoming raw food classes...email me at angelasalvucci@hotmail.com to sign up!


GET STARTED ON RAW FOOD!
Living on Live Food Level 1: Chef Certification

Are you ready to start losing weight, having more energy, and feeling positively radiant by eating the healthiest and tastiest food ever? This class is for you! You'll learn everything you need to get started on raw and living foods right now - no fancy gadgets or complicated techniques required! Just delicious, easy to make meals made of veggies, fruits, nuts and seeds. Join me to in this day-long class, designed by raw food author and restauranteur Alissa Cohen, where we'll discuss the basics of a day-to-day raw food lifestyle and make tasty dishes like "salmon" pate, angel hair pasta, fettuccine alfredo, stuffed mushrooms, collard roll-ups (a perfectly portable, take-anywhere raw meal!), broccoli soup, and of course, dessert...a delicious date nut torte, and more.
You'll leave class knowing how to set up your raw kitchen, shop for food, and prepare meals that even the kids will love! One recent participant said "...great introduction to what raw food is, and great recipes! I am excited to go home and make the recipes myself...I really enjoyed myself today..." Another called the class "very educational and eye-opening."
SAVE $15 each if you sign up with a friend!

Saturday, October 23
10am-3pm
Wilmington, DE
$125 Includes breakfast & lunch, raw recipe booklet, and Chef Certificate from Alissa Cohen.
EMAIL ME at angelasalvucci@hotmail.com to register.
****Please sign up by October 15. No refunds will be issued after that date****


JUST DESSERTS!
Delicious Treats, Naturally Free of Wheat, Gluten, Eggs, Dairy...and Guilt!

Tell the host "I'll bring a dessert!" and know there will be a scrumptious indulgence at the holiday party that won't derail your healthy eating plans.

We'll learn raw food dessert recipes that taste amazing, are actually nutritious, and are safe for a lot of the allergy sufferers out there. Plus, some quick & simple treats to whip up at home when the urge for something sweet strikes. Not a baker? No problem! You don't even have to turn on the oven for these goodies!

Come hungry for fruit pies, brownies, cookies, ice cream...and take home a few treats, too!

SAVE $5 each if you sign up with a friend!

Sunday, November 14
1pm-3pm
Wilmington, DE
$30 Includes raw recipe booklet, demos and samples, and a goody bag.
EMAIL ME at angelasalvucci@hotmail.com to register.
****Please sign up by November 8. No refunds will be issued after that date****


Monday, September 13, 2010

Tahini Zucchini Chips: I Munched, and Munched, and Munched


There's a weird line in Macbeth where the three witches are talking, and one says she saw a sailor's wife with chestnuts who "munched and munched and munched." The witch had asked the sailor's wife for some of her snack, and the wife told her to scram, she tells her fellow witches.
For some reason, that line has stuck on my head since high school English (and of course I think it with a creepy witch voice), maybe because it seems like such a more modern word than Shakespeare. It's not like the Bard wrote about some chick snapping onto a Slim Jim, but "munch" just seems slangy to me...anyway, as a fellow snack-o-saurus, I can identify with the sailor's wife not wanting to share.
I'm constantly trying to figure out yummy, veggie-based snacks for myself, to grab a handful of instead of grabbing fattier nuts or more calorie-dense dried fruit or something. Unfortunately, I'm not on such a high plane of rawness yet that I can just eat the veggie itself and feel totally satisfied...someday, maybe. But until then, I give you my recipe for Tahini Zucchini chips:
2 large zucchini
2 tablespoons raw tahini
2 tablespoons lemon juice
1-2 tablespoons water
Salt & pepper to taste
Slice zucchini into 1/8 inch rounds. Mine may actually have been slightly thicker than that, and they worked just fine.
Whisk tahini, lemon juice, water, and seasonings together in a small bowl with a fork, until smooth. Add any other fresh or dried herbs or spices that you like, as well, although salt & pepper were delish enough for me.
Toss zucchini with dressing until well coated. You may want to work in batches. I just used my hands, to separate the slices and coat them well.
Place on mesh dehydrator screens, and dehydrate at 105 for probably about 8 hours, depending on the humidity where you live, and how juicy your zucchini was to start. I did mine overnight, so I'm not sure about the exact time where they seemed quite dry. Mine never got totally brittle like a potato chip, but they were quite yummy. I recommend checking partway through dehydrating time to see if the seasoning is still good, and sprinkling on a little salt, pepper, or what have you if they need a little umph.
As I said, I munched and munched and munched, so these were gone in a couple of days. I imagine they would keep for several days in an airtight container...raw appetit!

Wednesday, September 8, 2010

Summer Supper: Pepper-Tahini Soup


Here's a great soup I made the other night, perfect for when you find yourself in possession of a lot of bell peppers. I preferred it chilled in the fridge for a while after I made it, but my husband liked it better after it was warmish from the blender. It is smooth, but adding chucks of veggies...more peppers, fresh corn, tomatoes, you name it...would also be delicious. I threw in some chunks of avocado. If you don't like tahini, or can't find a raw version, this would still be delicious, and more like a pepper gazpacho, without it. For some non-tahini creaminess, throw a handful of raw cashews into the blender (if you want to do so, try soaking them for a couple of hours first, so they'll come out smooth). I begin with a base of carrot, onion, and shallot, sort of a riff on the mirepoix base used for many soups. It creates a savory broth base for the other ingredients.
Bell Pepper-Tahini Soup
1 cup carrots, chopped
1 cup celery, chopped
1 tablespoon chopped shallot
1/2 teaspoon salt
2 cups water
Blend these ingredients until smooth. You could juice the veggies, and then add water, if you wanted to make a totally liquid broth, although the taste may be a little different.
To the base, add:
4 cups bell peppers (red, orange, yellow, or a mix), chopped
2 tablespoons lime juice
2 packed tablespoons chopped cilantro
1/2-1 tablespoon cumin
Dash of cayenne
1/4-1/2 cup tahini, to taste.
Additional salt, to taste (perhaps another 1/4-1/2 teaspoon)
Blend thoroughly until desired smoothness is reached. Adjust lime, salt, cayenne, cumin, etc. to taste. Serve at room temperature or slightly warmed from the action of the blender, or chill before serving. If serving chilled, pop back in the blender for a quick whirl or stir vigorously in case soup has separated.
As I like to say...raw appetit!

Tuesday, August 31, 2010

Thank Goodness for the Big Salad!


It is hard to believe that is is back-to-school time, and still so darn warm on the East Coast!! Hurricane Earl will be taking care of that in just a few days for us, but in the meantime, not only is it too hot to slave over a stove (if you are one of the crazy nuts still cooking your food) but it is too hot to even think about standing around the kitchen, chopping and blending and creating raw food meals!
Thank goodness for hearty salad, perfect for hot summer nights, especially when there's amazing produce in season. Elaine on Seinfeld was onto something with her Big Salad!
One of my favorite big summery salads uses sweet, local corn and local peaches...juicy, sweet and salty all at once, satisfying yet not too filling...and quick and easy to make!
Here it is, in the giant salad bowl my mother-in-law gave us as an engagement gift. We use it every day!
Here's what I throw together in my Big, Fat Local Summer Salad
A huge bowl full of salad greens (soft and juicy red leaf and green leaf work great, as do baby greens)
2 ears of corn, sliced off the cob
2 peaches, cubed
2 handfuls of walnuts, chopped (I like to sprinkle a little salt over them, before I chop, so it gets in the nooks and crannies)
Handful of dried or fresh cherries, chopped (chop with the walnuts & sprinkle of salt if using dried, for an assured salty-sweet contrast)
Combine ingredients in a giant bowl, and dress with:
1 tablespoon apple cider vinegar
2 tablespoons olive oil
Salt & pepper to taste (maybe 1/8-1/4 tsp of salt, and several cracks of fresh pepper)
Teaspoon or so of raw agave nectar, if you are so inclined
A tiny bit of minced shallot or onion, or a dash of onion powder, also optional
Whisk dressing ingredients together in a little bowl, and toss to coat salad.
Raw appetit!

Wednesday, August 18, 2010

Hawaii is for Lovers...and for Lovers of Raw Food!


I'm just back from Hawaii, after a fantastic wedding - complete with a raw entree option and raw wedding cake - and am happy to saw that the 50th state made feasting on living food easy.
Not only were there a slew of little restaurants and natural food stores with raw options, but fresh fruits and veggies were in abundance!
My new husband and I started our trip with a layover in Los Angeles, where we had enough time in the evening for a walk along the beach, and a great meal at Juliano's Planet Raw. We sampled all kinds of things...the jalepeno poppers and coconut curry soup were our favorites, although with a fabulous tasty salad. Of course, we brought a box of chocolate balls back to our hotel for dessert...
In Hawaii, we started out in Kauai, and straight from the airport we went in search of lunch. With the help of the iPod's map/search feature, we were soon on our way to a place with vegan options, figuring it was our best bet...but stumbled upon a raw food restaurant that had opened just a week before! Rainbow Live Food is in the same strip as Java Kai and the Mermaid Cafe in Kapa'a, located in the back of the building. We had delicious live burgers, wraps and falafel on our several trips there...and some fantastic smoothies. While we were eating lunch one day, a supplier brought in a box of avocados the size of dinosaur eggs! We were so grateful to have been drawn to the restaurant, especially since it had just opened.
Breakfasts at our gorgeous hotel consisted of TONS of amazing fruit...melons, citrus fruit, mango, and papaya, and of course sweet, perfectly ripe pineapple.
In Maui, we were staying at a condo, and therefore had our own kitchen to prepare food...woo hoo! On our first night there, we hit a Safeway, which had mangos from Mexico and greens of California...kind of a let down, since we'd really been hoping for some local produce.
We headed to the Whole Foods in Maui, though, and got tons of local kale and lettuce, local tomatoes, mangoes, avocados, etc...and of course, local pineapples. Even though pineapples are said to be "picked ripe" when you buy them on the mainland...the pineapples in Hawaii were so much more golden and sweet...much less acidic...I have to think they are picked a little riper when they don't have to be flown halfway around the world before you eat them. Once the workweek rolled around, there were a lot of farmer's markets to buy produce as well. The mangoes we found at Whole Foods were so incredible...much more interesting, intense, complex flavors than mangoes in the grocery store in the northeast...that we tracked down the farmstand for the orchard they came from, Yee's, and bought almost a dozen! Like everything in Hawaii, the mangoes were not cheap, but they were all ripe and incredibly delicious.
We also came across Joy's Place, a natural foods cafe and deli in Kihei on Maui, and were thrilled to find raw options there as well...in Paia, the Manna Natural Food store had raw entrees and desserts, and plenty of amazing produce, and some raw "junk food" like crackers and cookies as well. I wish we lived closer to this place...it looked smaller from the outside, but it went on forever inside, and had everything you could want.
On the Big Island, we survived with the help of a few picnics we foraged for at the Island Nautrals chain of health food stores. We visited three on the Big Island (there's at least one on Maui as well). They have some raw entrees and dessert options, depending on the location, as well as a big salad bar and snacks, and a juice/smoothie bar.
And of course, the coconuts are literally falling off the trees in Hawaii! Lop the top off, and you'e got the most refreshing drink. We convinced the restaurant to hack into the coconuts above for us, so we could scrape out the meat once we finished the coconut water, and I made a dressing with it one day, and added it to a smoothie the next.
Of course, we did our share of sightseeing, swimming, snorkeling, etc. while we were there...and as great as Hawaii was for our bellies, it was even more beautiful for our eyes. Nature's beauty - and fury, as we witnessed while lava flowed, hissing and steaming, into the ocean only 20 or 30 feet away - was fully apparent in Hawaii, and it reminded us that we are just guests on this incredible planet.
Mahalo!

Thursday, July 15, 2010

What's Up, Doc? Carrot Cumin Crackers


I haven't stopped making delish raw food, I've just been verrrry busy with last minute details for my wedding (yes, I'll be eating raw there, too, with a raw entree and even a raw wedding cake!), and haven't been able to gather my thoughts long enough to blog!
But I have to post this recipe for raw carrot cumin flax crackers for my Aunt Theresa, who asked for the recipe...I might as well share with everyone!
I use a juicer for the carrot pulp, but if you don't have one, just use the food processor...and know that the dehydration time will be longer.

Here's the recipe:
2 cups of flax seeds, soaked in 2 cups of water for 2-3 hours (you really can't skip this step...the soaking makes a goo that sticks the whole thing together)
Pulp of 2 pounds of carrots that have been juiced
Cumin, cayenne & salt to taste

Mix carrot pulp and soaked flax seeds together, either in a bowl (more labor intensive, if you are looking to build your biceps) or in the food processor. Add cumin, salt and cayenne to taste...I like cumin, and it goes great with carrots, so I used more than a tablespoon...start with a little less, and see how much you like. A dash or more of cayenne works, depending on how spicy you like it...and at least a teaspoon of sea salt. You could also add garlic, or onion powder, and who knows what else!

Spread on a plastic dehydrator sheet, til you have a thickness of 2-3 flax seeds stacked on each other, and dehydrate for 6 hours or so, until the edges are curling up...flip onto a mesh screen, peel off plastic backing, and dehydrate for 3 or so more hours, until very crisp. These keep well in an airtight container...mine have stayed crispy and yummy for at least a week. Great served with hummus, olive tapenade, or other dips. As I like to saw...raw appetit!

Tuesday, June 15, 2010

Magic! Raw Seven-Layer Bars (Well, Seven-ish)

A friends mentioned she tried raw seven layer bars the other day (and said they were delish!), and so of course I had to invent a recipe for my own version. My mom used to call them Magic Bars, and I think the magic was that they were easy to make, with just a few ingredients, and the end product is greater than the sum of its parts. The raw ones are even easier – no baking! And I just kept using the same mini food processor for each step, without bothering to wash it out in between. Hey, it’s all going to the same place! This version is exceedingly better for you than the original, which uses graham cracker, butter, condensed milk, coconut (ok, I kept that ingredient), and various chocolate chip flavors and nuts. This one only has four layers, but I think in the original people were counting butter, condensed milk, and additional chip flavors as another layer…

Here’s the YUMMY recipe…

“Graham Cracker” Layer

1 cup of walnuts

1 cup of dates, pitted

Pinch of salt, dash of vanilla or some vanilla bean

Blend the above in a food processor until smooth and balled-up…press into a 9 inch pie plate (or other smallish pan).


“Chocolate Chips”

1/3 cup almond butter

½ of the third of a cup of agave nectar (use a few dates and a tablespoon of water if you prefer not to use agave)

¼ cup raw cocoa powder

Blend almond butter, agave nectar, cocoa powder in a food processor. Here is a little more magic…somehow these liquidy things get more solid when combined in a food processor. Blend until a doughy ball forms. Roll little balls…about the size of two chocolate chips together, and dot over top of walnut and date layer.

Nuts Layer (No “ ”, because we’re actually using nuts here)

Crush up 1 cup of pecans (or another nut of your choosing) in a food processor, with a pinch of salt, and fill in where the chocolate balls aren’t…here’s a photo of half with nuts, half without.

Coconut Layer

1 cup shredded unsweetened dried coconut

2 tablespoons coconut oil

Pinch of salt

1 tablespoon agave (it is fine to sub in a couple of dates here, as well)

Combine well in a food processor and press over the mixture already in the pie plate. Freeze or refrigerate until it firms up a little (if you can wait that long), and cut into bars to serve. Store in freezer or fridge. You can bring to room temp before cutting and serving if you would like the coconut soft, or serve from the fridge if you like it firm and crumbly...

This is rather sweet, but totally delicious. Raw appétit!

Tuesday, June 8, 2010

Raw on the Road...with the Family Medjools

I'm traveling...again...which is the absolute hardest time to eat raw. Add to that a couple of parties to go to, meals eaten out, and being around family and friends...it is hard! But it is easier as long as I make sure to have a few treats for myself...I've posted the brownie recipe below before, but it is worth repeating because it is really easy to do...and really darn yummy! And a nice break from another plain salad or green smoothie, which are away-from-home staples...little treats spice up what can other wise get tiresome.
I have to say, though, my family is absolutely awesome about supporting my raw food lifestyle...my mom always has plenty of veggies, fruits, and nuts for me, and we even found raw kale chips at a Whole Foods the other day!...and my aunty made a raw zucchini pasta dish for a party over the weekend (creamy pesto sauce tossed with spinach and zucchini noodles...she saw it here in my post of March 10, and it is one of her favorites!).
Of course, you don't HAVE to be traveling to make these brownies...they are nice at home, too! If you don't like chocolate or don't want the little bit of caffeine, just the dates and walnuts are yummy on their own! Topping that with a slice of fresh fruit would be deeelish!

Easy Brownies
1 cup walnuts (pecans are nice, too, and I've also done it with cashews, although they make it a little crumblier)
1 cup pitted dates (try to use nice soft ones like medjools)
2-3 ( or 4 or 5) tablespoons raw cacao powder (or raw carob, if you prefer)
Pinch of sea salt

Process this all in a food processor until you can't tell the dates from the nuts...it seems like this will not be possible, but if you leave it in there long enough, it will. You'll notice the walnuts releasing their oils on the sides of the processor, and it will turn dark and sticky. Touch the sides of the container while it is processing to make sure it doesn't feel hot - you don't want to roast your walnuts! Roll into balls or shape into a brownie-like thing, and either refrigerate or freeze in an airtight container until it is time to nosh! Raw appetit!

Monday, May 31, 2010

Memorial Day Cookout Berry Cobbler!


This fresh raw berry cobbler reminds me of the cakes decorated with blueberries and strawberries that people bring to Memorial Day and Fourth of July parties...I used strawberries and blackberries in mine, but blueberries would be delicious as well!

You could use frozen here, but I think fresh, in season berries are much tastier! For the spring and summer time, I like fresh strawberries as the primary fruit, but use any in season fruit you like…this would be delicious with peaches in the summer, or apples in the fall.

Filling:

2 ½ cups strawberries

¾ cup blackberries

½ cup medjool dates

1) Wash and slice strawberries, and place two cups of strawberries and the blackberries in a large bowl. Squish them gently with a fork, to release some of their juices.

2) In a food processor, combine the additional ½ cup of strawberries with ½ cup of pitted dates. Soft medjool dates are best for this, but if you can’t find nice, soft dates, pit and soak your dates for 10 minutes, then drain them before using in the recipe. Blend berries and dates until smooth

3) Add blended berries to sliced berries, toss well and set aside

Crust:

1 cup almonds

½ cup dates

1 tablespoon coconut oil

½ teaspoon vanilla

½ teaspoon or so of cinnamon, to taste

Pinch of sea salt

1) Combine almonds, pitted dates, coconut oil, vanilla, cinnamon and salt in a food processor until it is almost like a cookie dough, but you can still see small crumbs of almond

2) Press mixture into a pie plate

To Serve:

1) Top crust with berries, and refrigerate before serving or serve immediately.

2) Take several small scoops of the mixture and layer them into an individual serving bowl, so it resembles a cooked cobbler

3) Alternately, you can simply place a few tablespoons of the crust mixture directly into the serving bowl, top with some berries, and continue to layer it, rather than pressing into the pie plate first.


Sunday, May 16, 2010

It's Easy Drinking Greens: No Juicer? No Problem!!


I admit it, I haven’t yet totally acquired a taste for green juice. I don’t hate it, but I don’t love it.However, it is touted by many as a fabulous elixir for health, so I know I should drink it! So I do, sometimes…although not yet being in possession of a juicer (I’m far more partial to drinking my greens in smoothie form), I’ve had to improvise a little and use the blender and a creative straining process. Purists would tell you that blending the juice and then filtering out the solids is not as good a method for getting the most of your juice as, say, actually making it with a juicer, but I think it is still a pretty darn good way to get a lot out of your greens. So if you don't have a juicer, and would like to try green juice, and don't live next door to a juicer bar, give it a shot! Adding an apple or some lemon the first couple of times will help you get used to it...Depending on how juicy your veggies are, this probably makes about 16 oz.

Here’s my recipe, meant to be tweaked:

1 large cucumber (peeled if it is waxed)

1 heart of celery (7-8 stalks)

Couple handfuls of spinach

Sometimes ginger, an apple, some lemon juice or some parsley

1 ½-2 cups of water

First, roughly chop all your veggies, and put them in the blender with 11/2 cups of water if you are using a cuke, 2 cups if not. It looks like this:

Second, blend. Depending on the size of your blender, you may have to blend up some of it first to fit the rest in. Blend until very smooth. Make sure it doesn’t get warm in the blender.

Third, filter through a nut milk bag, or an 8 inch foot section of CLEAN pantyhose. I fit the pantyhose over the mouth of a jar, secured it with a rubber band so that about 2 inches were hanging down, and poured in some of the green mix, like so:


Repeat this process – occasionally undoing the pantyhose, if that is your method, and gently squeezing out juice (yes, it is a little like milking a cow), or squeezing out the nut milk bag, emptying pulp, and adding more mix, until all the mix has been separated…

Finally, enjoy your juice! It has already been diluted, which it should be in any case, but feel free to dilute further with water. Remember to enjoy your juice immediately after making it, and preferably on an empty stomach! It is alkalizing and provides you with a better nutrient punch that any vitamin capsule. Raw appétit!

Saturday, May 8, 2010

Upcoming Raw Food Classes! Spring Cleaning for Your Body...

Just taught a "restaurant-style raw" class the other night with mediterranean pizza, beet raviolis filled with herbed cashew cheese and topped with pesto, garlicky greens on the side, and a strawberry tart for dessert...yum! The recipe for the pizza - which was the #1 crowd pleaser - is pasted below.
If you are in the Wilmington, Delaware area, check out my Spring Cleaning class on May 15:
Would you like glowing skin, sparkling eyes and tons of energy for summer? Just as you air out and clean up your house in the spring time, your body needs detoxification and rejuvenation to feel and look its best! Join us to learn:

-Eating for Beauty: Detoxifying Recipes

-Proper food combining to aid digestion

-Simple techniques for cleansing and detoxification
$35, Class will be held at Pure Yoga Pilates Studio in Wilmington. To sign up, emailinfo@pureyogapilates.com, or call 302-225-YOGA.

I'm also doing another Getting Started on Raw Food Level 1 class on June 26 - check out www.rawteacher.com/angelasalvucci for more details, or email me at angelasalvucci@hotmail.com. Everything you need to know to eat raw!

Here's the Mediterranean pizza recipe:


On your favorite raw pizza crust (I use Alissa Cohen's easy crust recipe from "Living on Live Food" most of the time) or a thin slice of eggplant or zucchini, add:

Cashew-Shallot Cheese Sauce:
1 cup of cashews, soaked for one hour or more
1 shallot, chopped (about 1 tablespoon)
Juice of one lemon (or more or less, to taste)
1/2 teaspoon of salt
Cash of cayenne pepper
Blend all ingredients in a food processor, adding a few tablespoons of water, to desired smoothness.

Fennel and Arugula:
Toss 1 cup of very thinly sliced fennel (I used a mandoline, but you could also used a veggie peeler) with 2 cups arugula, 1 tablespoon of lemon juice, 1 tablepoon olive oil, salt & pepper to taste

And black olives...I am loving the black olives with celtic sea salt I recently got from Matt Monarch's www.rawfoodworld.com. They are seriously amazing...and even more so on this delicious pizza! Raw appetit!


Wednesday, April 28, 2010

Getting Back to Raw Lifestyle Basics


I’m working on getting back to basics with my own raw food lifestyle lately…I have gained 4 or 5 extra pounds over the past couple of months, and while I first blamed it on adding extra muscle during marathon training, it really was more a result of adding extra cashews…and raw macaroons…and kale chips…and lots of tahini…and too much olive oil…to my diet.

While I’ve been very good about making greens the basis of my diet, adding extra fat to them to make them tasty (VERY tasty) isn’t a good thing, and it is entirely possible to overdo it eating just about anything, regardless of whether its “raw” or “healthy.” And given that I have a wedding dress fitting in a few weeks – and would very much like to fit into the dress! – it time to pay a little more attention to what I put in my mouth!

I think simply being more mindful of the added fats that I eat will do the trick, for example, putting a tablespoon of tahini on a salad rather than gobbing it on, or measuring out a couple of teaspoons of oil to marinate veggies rather than just eyeballing it (obviously, my eyes are bigger than my belly!). But I am also trying to add lighter, more hydrating soups into the mix of the salads and raw entrees I eat…for example, lunch today was a yummy, savory blended soup pretty much made of what veggies I had around. I just chopped it up, and tossed it in the blender…easy, and tasty.
Zingy Green Soup

1 ½ cups celery

3 cups cucumber (peeled if skin is waxed)

1 ½ cups parsley

¼ cup dulse (other sea veggies would work fine, too)

1 cup water

Juice of ½ to 1 lemon

1 clove of garlic

1 inch knob of ginger, peeled

Pinch of salt & pepper, to taste

Chop everything into medium sized pieces (to be kind to the blender), and blend all ingredients in a blender until smooth. The dulse (which will add a concentrated mineral punch, as well as lots of flavor) will impart some saltiness, so don’t add salt until after the dulse is blended in and you’ve tasted the soup for seasoning. That’s it! Raw appétit!

Sunday, April 18, 2010

Gearing up for Another Raw Marathon

I'm in Massachusetts today, getting ready to run the Boston Marathon tomorrow! I just made my raw energy bars - a recipe from Brendan Brazier's book "Thrive" - and have been soaking/sprouting oat groats for my pre-race breakfast. I forgot the mesh strainer I normally use to drain them, so I've been using my mom's knee highs! (A new pair, of course!) I've been eating lots of hydrating veggies and fruits the past couple of days, and of course drinking plenty of water...I think I'm ready! I forget what meals I had the night before my long training runs, so I'm going to stick with my favorite salad...kale, parsley, and tahini. In the morning I'll rinse the oats again, add cinnamon, a banana and some raisins, and head out for the race - simple! Before I went raw, I would freak out before a marathon about what food I was eating in the days leading up to the race, the night before, the morning of, etc. And during the race, I'd pump myself full of energy gels and sports drinks that have goodness-knows-what in them. I'm very relaxed today (well, as relaxed as I ever could be), and I think that knowing that I'm making great choices to fuel my body helps keep the nerves in check. Unfortunately no amount of kale can guarantee perfect weather and a tailwind tomorrow, but I've done everything in my power to ensure a great race.

Tuesday, April 13, 2010

Got Sprouts? Sprouted Chickpeas Hummus

The "mother" of the raw food movement, Ann Wigmore, said about the way of eating "Live food, live bodies, dead food, dead bodies."

In referring to raw food as "living" food, most people are just referring to the nature of the fruits, veggies, nuts and seeds...nothing has been cooked, and all of the enzymes of the food are intact. Sprouts, in particular, are pretty lively. As little seeds literally bursting with life, they are chock full of enzymes and are particularly nutrient dense. How could that not be a great way to fuel your body?

I admittedly don't love sprouts on their own or in a salad, but sprouted chickpea hummus is a really yummy way to eat a whole bunch of them.

First, you have to find chickpeas for sprouting. I get mine from a special sprouting seeds rack at the health food store. Soak the chickpeas over night with WAY more water than you think they need, because they really soak it up! In the morning, drain water, rinse, drain again, and let the chickpeas hang out in a colander or bowl. I like to cover my bowl with a paper towel to keep dust out. Rinse and drain at least 3 times per day, until most of the chickpeas have grown tails about ¼ inch long, about 2-3 days. They are ready to use! (There is a photo below of what they look like, before and after)

For the hummus:

3 cups sprouted chickpeas

¾ cup raw tahini (I find mine in the refrigerator at the health food store…it is also delish with lemon, oil, salt & pepper as a salad dressing)

4-5 cloves garlic

3 tablespoons olive oil (you may need more if your chickpeas seem really dry)

1-1 ½ teaspoons sea salt

1/3 cup lemon juice (from about 2 lemons, depending on their size)

½ cup parsley

Pinch of cayenne (optional)

Combine chickpeas, tahini, lemon, oil, garlic in a food processor until the mixture is well combined and to your desired smoothness. Season with salt & cayenne if desired, and add parsley – process again until parsley is mixed in and chopped up. Add a tablespoon or so more oil if you want smoother, more liquid hummus. Remember, the tahini, lemon, garlic, cayenne & parsley should all be added to taste….start with a little less if you are unsure, and add a little more until you get to the flavor you prefer. This will keep for 2-3 days in the fridge.

Raw appétit!

Monday, April 5, 2010

What's up, Doc? Raw Carrot Tahini Soup

I love to try to convert cooked recipes to raw versions, and when I saw a recipe in the New York Times for Carrot Tahini soup the other day, I knew I had to try it out. Raw tahini has been one of my favorite ingredients lately, just tossed with a salad or in sprouted hummus, so my mouth was watering as soon as I read the article. The author herself had invented the recipe in an attempt to get her daughter to eat more veggies…the kid loved hummus, but typically just licked it off of her carrot sticks. The author’s version included fresh thyme, dried coriander, and tumeric, and since those are things I don’t typically have around, I omitted them and made some additions of my own.

Raw soups – just like all other raw food – can be tricky to convert because usually veggies taste different raw, and can be different from one day to the next depending on how fresh they are. And I added a couple of dates at the end, figuring one thing missing from the overall taste was the caramelized sweetness of sautéed carrots.

Not having made the original, I have no idea how mine compares, but I think it is pretty tasty:

In a large blender, combine:

½-3/4 cup leeks, chopped, depending on how leeky you think you’ll like it

1-2 cloves of garlic, depending on how many vampires you want to scare away

1 ½ cups celery, chopped

4 cups of carrots, chopped

3 tablespoons lemon juice

½ cup raw tahini (I find this in the fridge at my local health food store)

1 -1 ½ teaspoons salt (start with one, add a little more if necessary)

2 cups of water (start with 1, add more as you go til you get to desired smoothness)

Pinch of cayenne

Pinch of black pepper

Handful of fresh cilantro (probably ½ cup loosely packed)

Handful of fresh parsley

2 dates

Blend to desired thickness and smoothness. This recipe will make 6-7 cups, so make sure your blender is large enough for all that. If not, halve the recipe (or make ¾ of it, if you are particularly mathy), or get a bigger blender! Serve chilled or lightly warmed from the action of your blender.

Raw appétit!