Thursday, December 17, 2009

Have Your Carrot Cake, and Eat it Too


I was faced with quite the predicament this afternoon: no (well, very little) food in the house, and a little bit of a dessert craving. I just about always have dates and walnuts, which I would usually throw together with raw cacao powder to make brownies, but I was running low on cacao, and I wanted to save the half cup or so I did have for an emergency. (Raw girls can have chocolate emergencies, too!)

The one thing I did have was carrots…they were the stubby ugly ones left in the bag, but they were there. I’ve thought several times of making carrot cake and how I would do it, so I seized the opportunity. I didn’t decorate the top with anything cute, but you could whittle Barbie-sized carrots and stick them on top of the frosting, with little pieces of parsley for stems, if you were feeling like a big food nerd.

Cake:

2 cups of raisins

2 cups of walnuts

1 teaspoon cinnamon

Pinch of salt

2 cups of carrots, finely shredded or grated (I used my spiral sliver to make very thin tendrils…remember, you aren’t cooking it, so you need a pretty fine shred so the carrots are soft enough – you don’t want to crunch when you bite in!)

Blend raisins, walnuts, salt and cinnamon in food processor until the mixture is very smooth…you will hardly see pieces of walnuts anymore, the nuts will be releasing their oils, and the whole thing will turn into a doughy ball in the food processor. Add carrots, and pulse chop a few times, until the carrots are incorporated but still visible. Spread onto a plate or tray, about ½ to ¾ of an inch high, in a round or rectangular shape, whatever catches your fancy. You may notice that the walnut oil and carrot juice create a slightly greasy goo around the plate. Don’t worry. You can either sop it up with paper towels, greasy-pizza-style, or transfer the cake to another plate before frosting. Chill the cake before frosting if you can.

Frosting:

½ cup dates (I used very soft Medjool dates – if your dates are hard, soak them for at least an hour, then drain before using)

1 cup cashews, soaked for 1-2 hours, then drained

4 tablespoons fresh orange juice (or lemon, if you prefer)

Blend in food processor until very smooth and a little fluffy – be patient! Spread on cake and serve in small pieces, as it will be very sweet and rich…raw appétit!

Thursday, December 10, 2009

Classes start in January!

I'll be teaching Alissa Cohen's Living on Live Food Level 1: Chef Certification beginning in January.

Kick off the New Year and make good on your resolutions by getting started on raw!

Are you ready to start losing weight, having more energy, and feeling positively radiant by eating the healthiest and tastiest food ever? This class is for you!

You’ll learn everything you need to get started on raw and living foods right now – no fancy gadgets or complicated techniques required! Just delicious, easy to make meals made of veggies, fruits, nuts and seeds.

Join me to in this day-long class, where we’ll discuss the basics of a day-to-day raw food lifestyle and make tasty dishes like “salmon” pate, angel hair pasta, fettuccine alfredo, stuffed mushrooms, collard roll-ups (a perfectly portable, take-anywhere raw meal!), broccoli soup, and of course, dessert...a delicious date nut torte, and more.

You’ll leave class knowing how to set up your raw kitchen, shop for food, and prepare meals that even the kids will love!

January 23
10am-3pm
Wilmington, DE

$125
Includes breakfast & lunch, raw recipe booklet, and Chef Certification from Alissa Cohen.

To sign up for class or ask any questions, please call me at 617-797-9994 or email at angelasalvucci@hotmail.com. You must sign up in advance. Check out www.rawteachers.com/angelasalvucci for more info on future class dates.

I will also be thrilled to work with you individually or in a group in your home - just get in touch and we'll work out the details!

Holiday Crowd Pleaser: Creamy Spinach Dip

It’s not the greasy, cheesy, mayonnaisey mess that restaurants serve – but that’s a good thing! No one will complain that they miss all that fat when you bring this the holiday party, because this dip is so yummy! Avocados are the secret ingredient that makes it rich and creamy. I got inspiration for this from Alissa Cohen’s Spinach Dip recipe in Living on Live Food, and kicked things up a little with more spices and flavoring. You could do even more, adding fresh or sundried tomatoes, or more of your favorite herbs.


16 oz baby spinach (Adult spinach is fine, too)

2 large or 3 medium, quite ripe avocados

2 large cloves of garlic

½ of a lemon’s worth of juice (about 2 tablespoons, or more if you like lemon)

1 teaspoon onion powder

¼-1/2 teaspoon cayenne

1-1 ½ teaspoons salt

¼ cup packed fresh basil

Start by pureeing spinach in the food processor. It may take a while to get going, just be patient, and keep scraping down sides. Then add avocados, and the rest of your flavoring.Adjust salt, pepper, lemon, etc as necessary – working with fresh veggies means you never quite know how much seasoning it might need. Blend well, and serve with veggies to dip. My favorite is endive. Raw appétit!


Monday, November 30, 2009

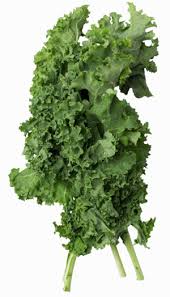
Eat the Garnish: Kale Chip Variations


My mom spotted me eyeing the kale used to anchor the stems of a fruit bouquet at Thanksgiving, and we joked that I like to eat the garnish.

But it got me thinking, the garnish is a good place to look for raw foodies at a restaurant or at a party, looking for things to eat. I won’t necessarily condone canvassing a restaurant for shreds of kale and pieces of parsley from your fellows diners…don’t give raw foodies a bad name!...but keep in mind that most restaurants will have garnish items (like kale) available, so you can always ask them to add it to the mix to spice up a big salad or plate of veggies. And no one will be the wiser is you grab a few extra pieces of parsley off a cheese or fruit display, and it could spice up your salad a little, not to mention give it a little nutrition kick. So go ahead, eat the garnish!

In that spirit, I got home last night after several days of Thanksgiving travel, and was definitely happy to get back to my dehydrator, and the variety it provides…I have some raw pizza going in there now, and also my favorite snack: kale chips!

I already know how they’ve turned out, because I snagged pieces at various stages of crispness (including not crisp at all) throughout the day…and they are, as usual, delicious, although not as complicated as when I usually make them.

Usually I use a pesto, but today, I was without basil. So I tore up my kale into medium pieces (the size of a large Tostito), washed it very well, and prepped it for chipification in the following ways:

Salt & Pepper Kale Chips

Drizzle of olive oil…about as much for a similar quality of salad. Probably about 1-2 tablespoons for a big, loosely packed bowl of kale

Salt & pepper to taste…BE CAREFUL with the salt. You want to salt the kale until it tastes like it could use just a tiny smidge more, but then don’t add any more. The chips taste saltier (or more peppery, garlicky, or whatever) once they are dehydrated

Smoosh the S&P and oil into the kale with your fingers, so the leaves are evenly coated…dehydrate at 105 for 3-4 hours or so.

Spicy Kale Chips

Same thing as with the olive oil & salt above, but instead of black pepper sprinkle on chili powder…again, be careful of how much your use, because the flavors concentrate once the kale it dry.

Leftover Tomato & Basil Kale Chips

I had leftover tomato sauce, about a quarter cup. I had used a 1:1 ratio of fresh tomatoes and soaked & drained sundried tomatoes, one clove of garlic and a pinch of salt in the original recipe. To the quarter cup that remained I added about a tablespoon of olive oil and a small handful of fresh basil, and an extra pinch of salt. Massage into a big bowl of loosely packed kale, and dehydrate…may need a little longer than the others, like 5 hours, because the tomatoes are extra wet.

Raw appétit!

Sunday, November 22, 2009

Raw Thanksgiving Ravioli


Thanksgiving, and what to bring, has been on my mind, since this is the first Turkey Day that I’ve been raw. I was never really a fan of the bird anyway, but I used to load up a plate of veggies and DEFINITELY tucked into the apple pie.

So, I’ve been pondering a good dish (in addition to the Harvest Soup I wrote about last week) to bring along for the big day, to eat as my meal and to share portions of with my family.

While running the other day, I had a brain storm! I decided to change up the sausagey ravioli I made a few weeks ago, and turn it into Thanksgiving Ravioli, with some of the best flavors of the day, but with none of the cholesterol, and no post-meal stupor!! I’m posting a video of me making it below – pretty good camera work for an iPhone, I think! – as well as the written recipe below.

Thanksgiving Ravioli

Shells:

4 small-medium white & purple turnips (of course you’ll need fewer for this amount of filling if you manage to find nice big ones so that you can use one per ravioli)

2-3 tablespoons olive oil

On a spiral slicer or mandoline, make paper thin slices, and marinate in olive oil (I would say for at least half an hour, so they are nice and soft to serve)

Filling:

1 ½ cups walnuts, soaked for 3-4 hours and then DRAINED

¼ cup sweet onion

1 clove garlic

½ cup celery

1/2 cup fresh parsley

1 teaspoon fennel

1/4-1/2 teaspoon cayenne

1-2 tablespoons Bragg Liquid Aminos or Nama Shoyu (omit if you don’t like, and just season with a little extra salt. I used Braggs for the meat-y kind of flavor, and you’ll notice in the video, I started out with 3 tablespoons…this was on the salty side. Start out with one and add more if you want more!)

Salt & black pepper to taste (if necessary)

Grind up the walnuts, onions & garlic first, so you get them going and don’t have huge chunks. Then add the rest. I like to still be able to see the parsley and celery, if only in little bits. It’s like sausage stuffing!

Let this warm to room temp, or to 105 in the dehydrator before assembling/serving.

Sauce:

2 cups cranberries

1 green onion (just the tight part, white and a little green before it gets branchy)

½ cup fresh squeezed OJ

2-3 tablespoons agave

¼ tsp salt

Few cracks of fresh black pepper

Dash of cinnamon

Dash of nutmeg

Blend all very well in a food processor. I had little tiny bits of cranberry still…if you prefer something smoother or chunkier, go for it!

To assemble, lay softened turnips on serving plate, plop in a heaping teaspoon of filling, fold turnips into a half moon or top with another slice, like a sandwich, depending on how big they are, and top with sauce. This amount made about three dozen ravioli for me (sandwich-style). I warmed mine up in the dehydrator a bit. Raw appétit – and Happy Thanksgiving!

Friday, November 20, 2009

Too Amazing Not to Share!


Big news! I was just certified to teach Alissa Cohen Living on Live Food Classes, both Level 1 (a basic, getting started program) and Level 2 (advanced raw & live food prep, plus teacher certification for Level 1). I’m thrilled to start teaching – stay tuned for a link to class listings! If you have questions in the meantime, please feel free to email me at angelasalvucci@hotmail.com. Here’s a picture of me with Alissa…it was great to finally meet her, after reading and using her raw food guide & cookbook to get myself started on raw food, and I learned so much. I’m so grateful for the experience, and so excited to share it!

Meanwhile, here’s a recipe too yummy not to share! I learned it at a demo by Patricia Escoto of Inner-Workings at my health food co-op. I actually lost the original recipe, but I think I remember pretty well…

Harvest Soup

In a blender, combine:

1 large zucchini, chopped

2 cups of carrots, chopped or shredded

2 tomatoes, chopped

2-3 stalks of celery, chopped

2 dates

1 clove of garlic

1 teaspoon onion powder

1 cup of water or so (depending on desired consistency)

1/2 cup flax oil (or olive oil…I much prefer the flax, because I think it has a squashy flavor…you could use less, of course, if you wanted to make this lower-fat)

Salt & pepper to taste!

It actually looks like and is reminiscent of a butternut squash soup…delish! I’m planning on making it for Thanksgiving. As they say in France, raw appétit!

Monday, November 2, 2009

Raw Sausage Ravioli! That's Amore!


I’m only ¼ Italian (although apparently that was enough genetic material to form the entire lower half of my body, which seems to be made for climbing hills in Italy…but I digress…) but somehow Italian food has always been what I gravitate towards cooking. That’s been true on my raw journey as well…my favorite recipes are for lasagnas, pizza, noodles, and now…ravioli! I’ve worked with both beets and turnips as ravioli shells, and both work really well, look pretty, and taste yummy. “Rawviolis” are pretty enough for company, and seem pretty safe and comfortable for folks new to raw.

If you’ve read some of my previous blog entries, you’ll know I love the spicy, concentrated flavors of cured meats…so I did a sausagey filling in the ravioli, but you could make a simpler nut cheese and it would work as nicely!

Here’s how to make some smashingly tasty raw ravioli:

3-4 small purple turnips (this is good for 2-3 people…double the number of turnips and the rest of the ingredients for more)

1 ¼ cups walnuts, soaked for 3-4 hours

½ a medium avocado

¼ tsp ground mustard

½ tsp red pepper flakes

½ tsp fennel seeds

3 tablespoons Braggs Liquid Aminos

2 tablespoons fresh parsley

½ tsp onion powder

1 large clove of garlic

Salt & pepper to taste (watch it with the salt – after the Braggs, you may not need any)

First, prepare your ravioli “pasta”…with a spiral slicer or adjustable mandoline, make VERY thin slices out of all your turnips, about the thickness of two or three pieces of paper. Mine were small, so I made round slices to turn into sandwiches, but you could make half moon shaped raviolis with big turnip slices. Toss turnips slices with a tablespoon or so of olive oil to begin softening them.

Combine all of your filling ingredients in a food processor. For the love of Pete, try not to eat it all before you assemble the ravioli!

On the plates on which you intend to serve the ravioli, place the slices for your undersides. Places a teaspoon of filling on each, and then put the tops on, and press down until they stick.

For sauce, I used a concoction of ¾ cup sundried tomatoes, which had been soaked for several hours, ½ cup fresh parsley and basil, ¼ cup olive oil & salt & pepper. Pesto would taste great, too, or a more complicated tomato sauce.

Put a dollop of sauce on each ravioli (I use mine to cover the seams created by the spiral slicer), and warm in dehydrator at 105 or an oven set on the lowest tempt for 15-20 minutes.

Raw appétit…or should I say, appetito?